Chicken wings will always be a crowd favorite. But nothing gets more iconic than the humble Buffalo wing. The original recipe—invented in Buffalo, New York—called for wings that are deep fried and slathered in a sauce made by combining hot sauce and butter. Some like their wings breaded, most prefer them naked (like us). We prepped these wings with a dry brine so you can savor the wings’ natural taste and crispiness.
Dry brining makes these wings naturally juicy, flavorful, and crisp. Unlike wet brines, dry brines involve massaging seasonings directly onto meats, poultry, and seafood—no additional liquid needed. After a rest in the refrigerator, they’re ready to cook.
While wet brines are great for adding extra moisture to fried chicken, you’d have to pat the pieces dry to avoid steaming when frying. Dry brining ensures a ready-to-fry result, saving you a lot of time and effort.
We added a crucial ingredient into the dry brine: baking soda.
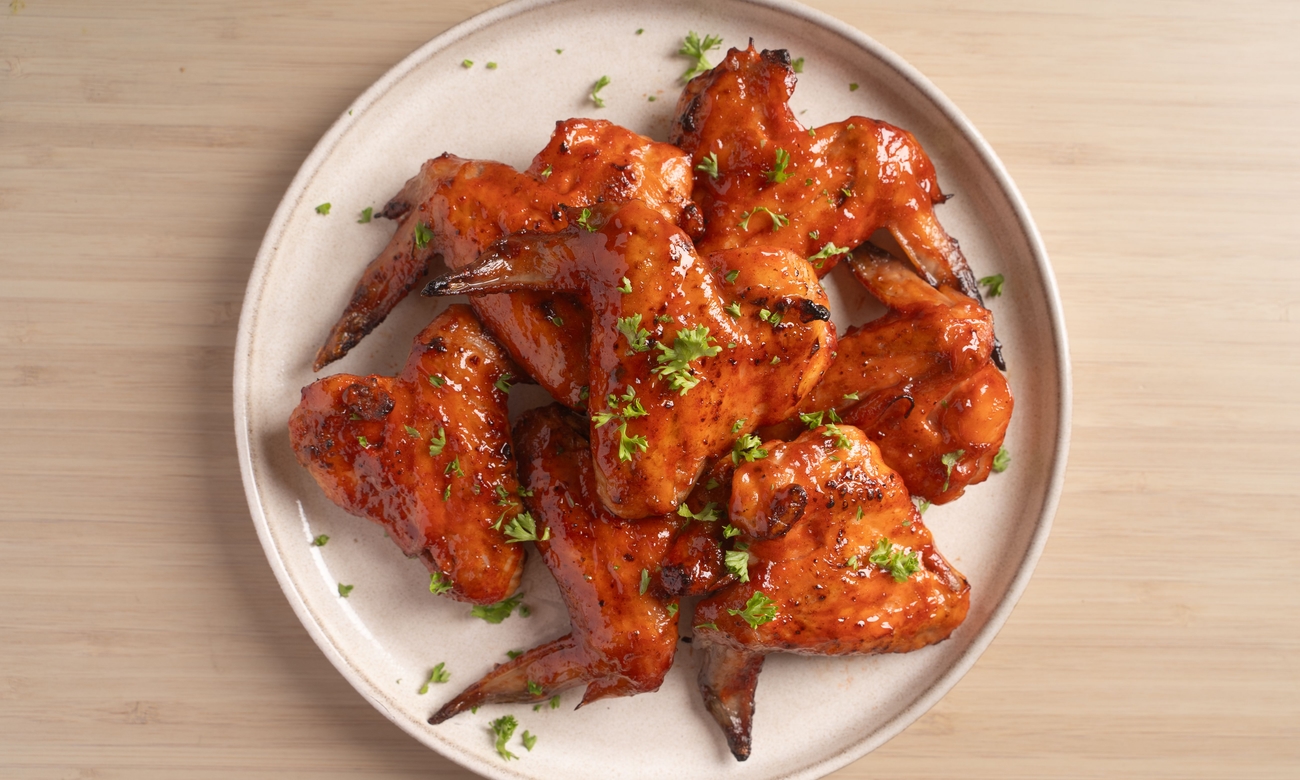
Homemade classic Buffalo wings are crispier, saucier, and always better than takeout.
How it works: Baking soda is an alkaline. When it comes into contact with chicken skin, it raises the pH level, causing the skin’s proteins to break down. Moisture from the skin evaporates quicker, leading to faster browning and crisping when it's cooked. The result is a mouthwatering crisp unlike any other.
You can also use this hack to achieve a crisp exterior for baked chicken!
As devilish as Buffalo wings are, not everyone loves the heat. That’s why you’ll see two sides often served with Buffalo wings to cool things down:
Dry brine wings: Pat chicken wings with a paper towel to remove as much excess moisture as possible. Transfer to a large mixing bowl. Sprinkle wings with cornstarch or rice flour, salt, garlic powder, baking soda, and pepper. Massage seasonings into the chicken until evenly coated. Lay the wings on a sheet tray or a plate in a single layer. Refrigerate chicken, uncovered, for 30 minutes up to overnight.
Make sauce: In a small pot set over medium-low heat, add hot sauce, brown sugar, and Worcestershire sauce. Stir until well combined. Once it begins to simmer, reduce heat to low to maintain the gentle heat.
Add in chilled butter one piece at a time. Stir to melt the butter before adding the next piece. You want to slowly emulsify the butter into the sauce to create a glossy finish. Once all the butter is combined, keep sauce warm over low heat until ready to use.
Fry chicken: Heat enough oil for deep frying in a heavy-bottomed pot or Dutch oven set over medium heat. Take wings out of the fridge and separate into drumettes and flats.
Once the oil registers 162°C or 325°F in an instant-read thermometer, fry chicken in batches until light brown. Make sure to fry the flats and drumettes separately—drumettes fry at around 8 minutes, while flats fry at around 5 minutes. Transfer to a wire rack or paper towel-lined plate to drain excess oil.
Turn the heat up to medium-high and bring the oil up to 190°C or 375°F. Return wings to the oil and fry until deeply golden brown all over, about 5 minutes.
Toss and serve: Using a spider, transfer wings to a large, heat proof mixing bowl. Pour 1 cup of Buffalo sauce over the chicken. Toss wings to coat each piece evenly. Add more sauce as needed, about ¼ cup at a time.
Serve wings while piping hot and crispy, with blue cheese or ranch dip and some celery sticks.
You can make a quick tangy sauce by mixing together mayonnaise, lemon juice, grated garlic, and Dijon mustard!
For the first fry, we want the chicken to cook as evenly as possible.
Since the drumettes are thicker and meatier pieces compared to flats, they require different cooking times. If you fry them together, the flats may dry out and overcook by the time the drumettes are done. So fry them separately! That way, each piece cooks evenly with that golden shine all throughout.
Don’t worry about the second fry— you can cook both pieces together by then.