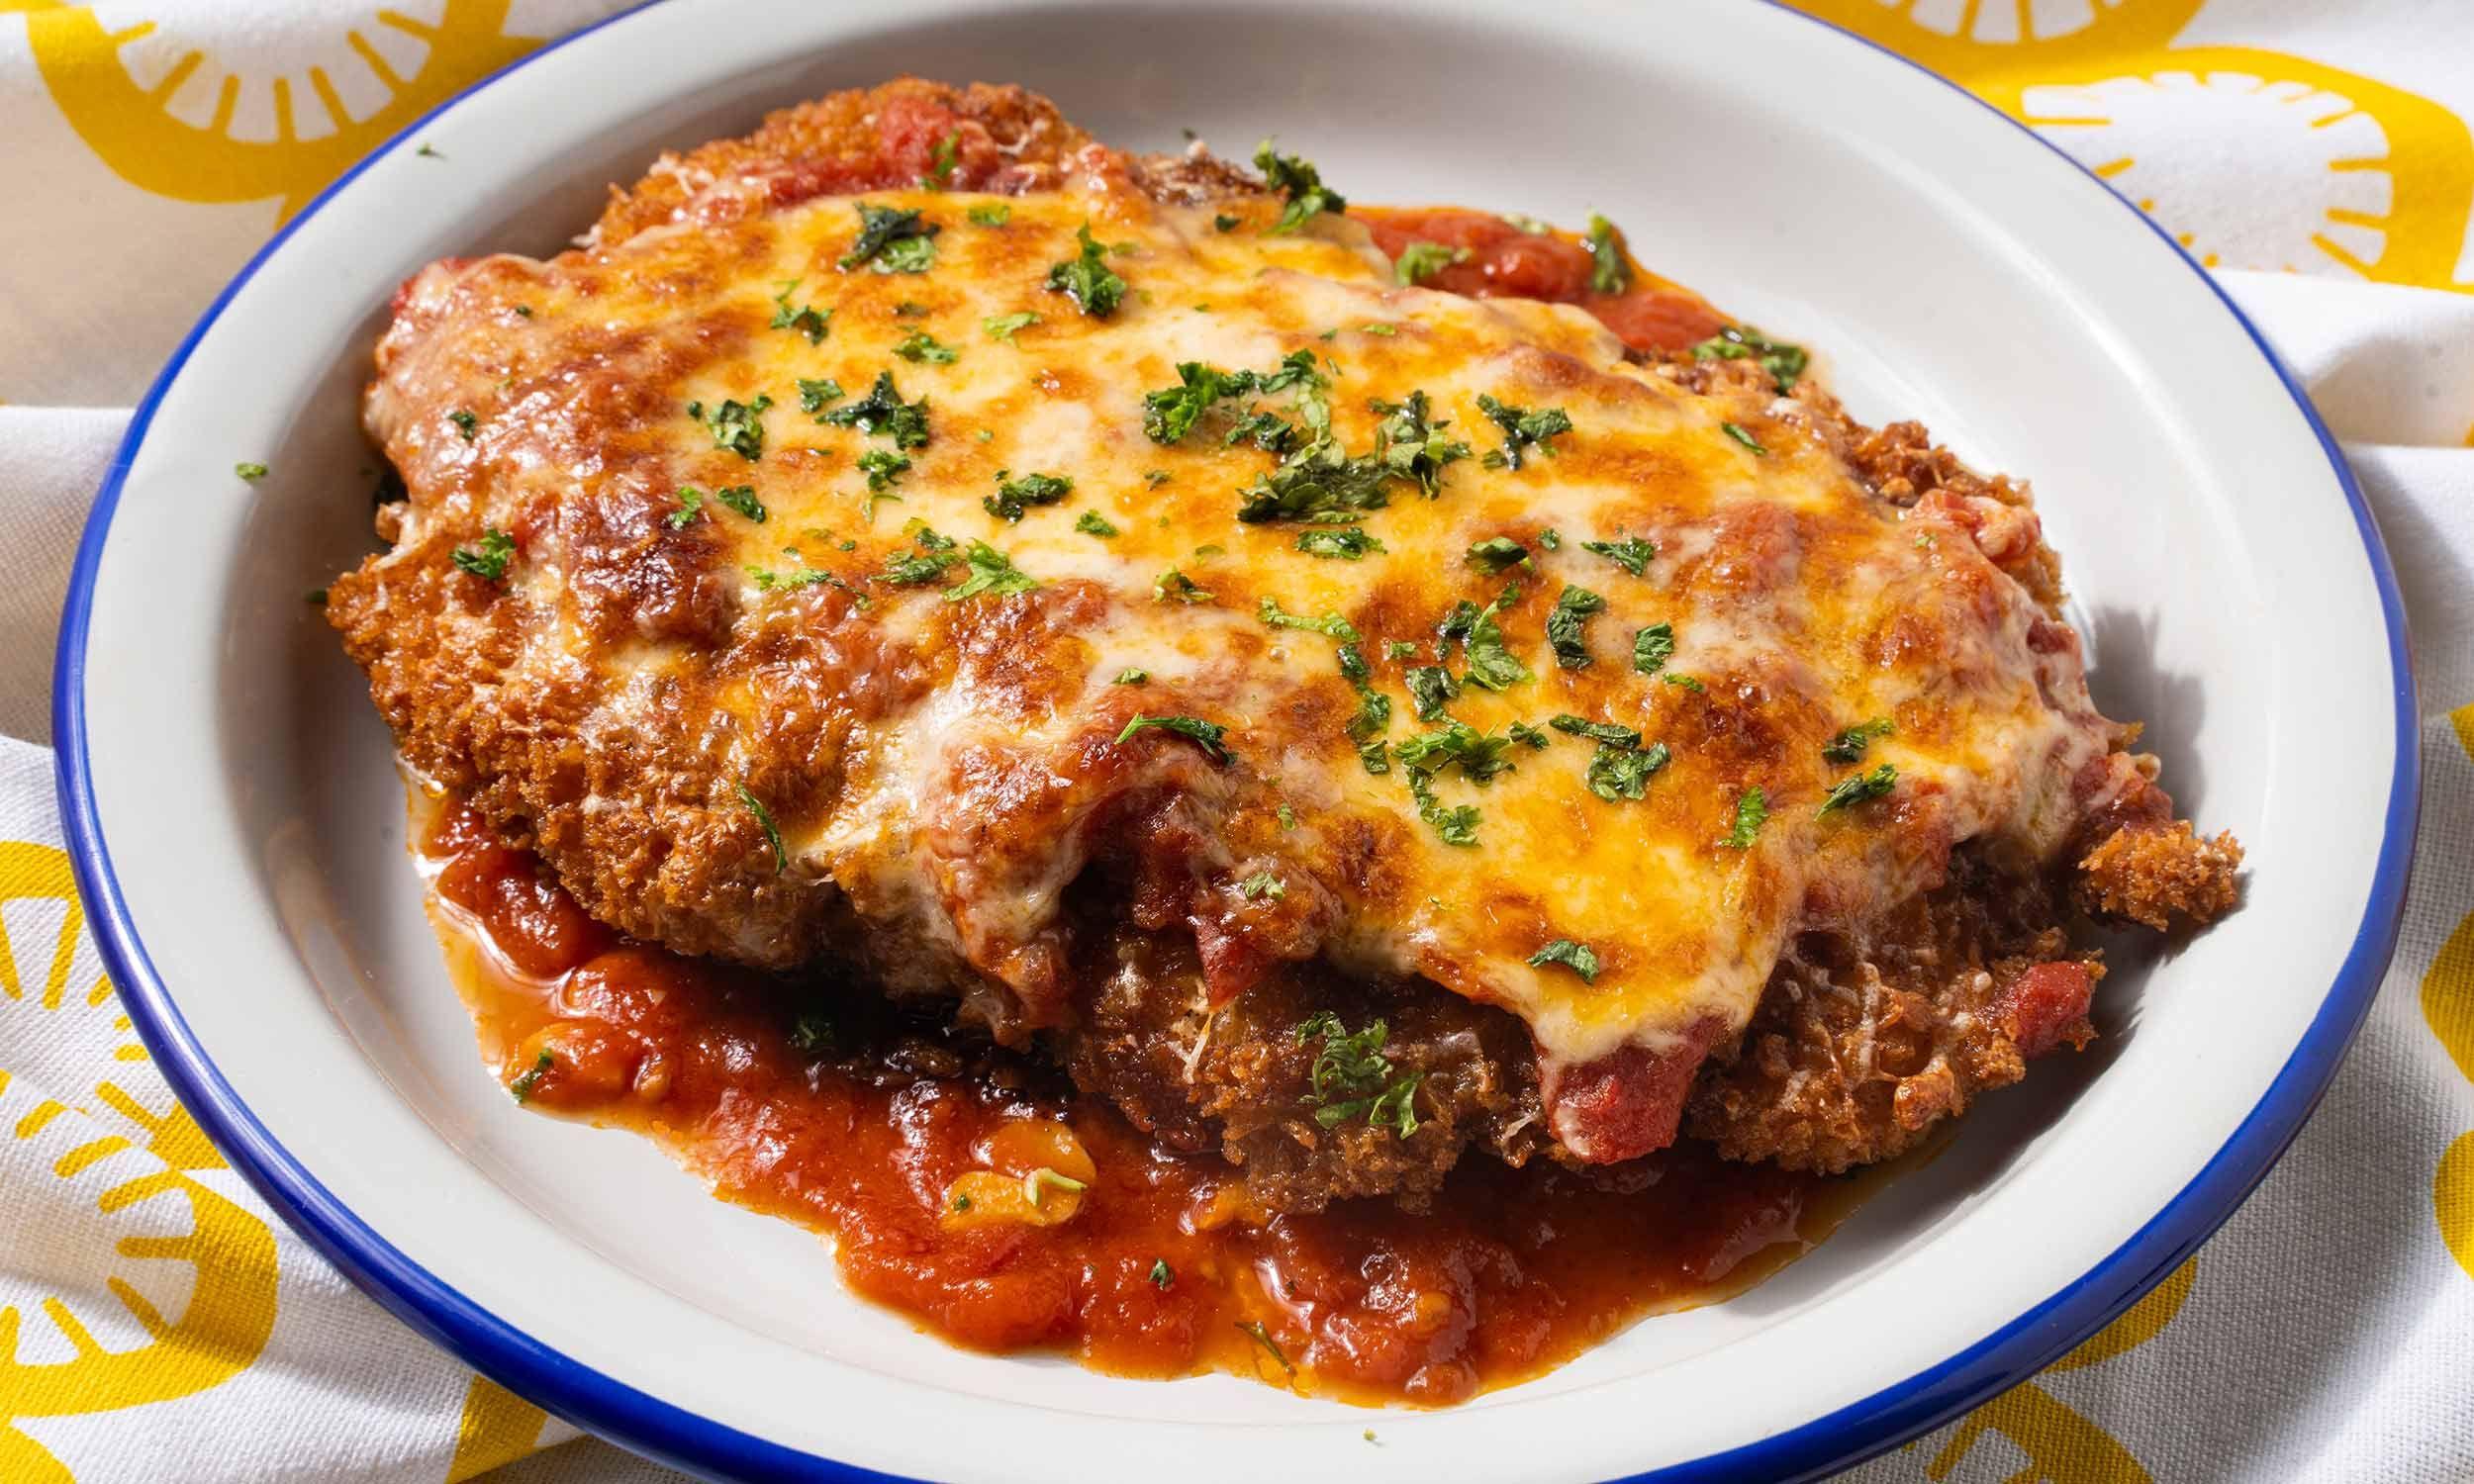
Chicken Parmigiana, AKA chicken parmesan or chicken parm, gets its name from the Parmesan cheese that tops the chicken cutlets. Those cutlets are breaded and deep-fried, forming a craggy crust that stays crisp beneath a carpet of tomato sauce. Simple, comforting, and crowd pleasing. Who would say no to fried chicken, tangy marinara sauce, and melty cheese?
Here's a tip for a richer fried chicken cutlet: Fry it in clarified butter. Unlike neutral oil, clarified butter imparts a bold, indulgent richness and buttery flavor to your fried food.
How to make clarified butter for frying
To make clarified butter, you need to cook out its natural water content. Place unsalted butter into a saucepan over medium-high heat. Let it melt and come to a gentle boil. You should see some white foam forming on the surface—these are your butter’s milk proteins.
Reduce heat to medium and continue to cook. The foam will start to break down and sink to the bottom. Eventually the butter will fall silent and stop boiling.
Strain liquid through a coffee filter over a heatproof container to remove the browned milk proteins. The liquid gold you have left is your clarified butter. Store it in the fridge for your buttery frying needs (it's excellent for pancakes). It should last about 6 months!
Make it ahead
For the sake of ease, you can prep a few of the chicken parm components ahead of time:
- The tomato sauce can be made 1 week ahead, stored in an airtight container in the refrigerator.
- Breaded chicken cutlets can be rested for 8 hours max before frying.
- Clarified butter can be made months in advance. (Or use neutral oil for frying instead.)
Ingredients
Tomato Sauce
- 1 28oz-can whole peeled tomatoes
- ¼ cup extra virgin olive oil
- 3 garlic cloves, thinly sliced
- 2 sprigs basil
- sugar, to taste
- salt and pepper, to taste
Chicken Parm
- 3 chicken breasts
- 1–2 cups all-purpose flour
- 3 whole eggs, beaten
- 1–2 cups panko breadcrumbs
- ¾ cup grated mozzarella cheese
- ½ cup grated Parmigiano Reggiano or Grana Padano
- 1–1 ½ cup clarified butter or neutral oil
- chopped parsley, to garnish
Prepare tomatoes: Pour can of tomatoes into a bowl. Using clean hands, crush the tomatoes until you get a chunky consistency. If you don’t want to use your hands, you can crush the tomatoes straight in the pot later.
Make tomato sauce: Heat oil in a large heavy-bottomed pot over medium-low heat. Add garlic and cook until fragrant and lightly golden, about 2 minutes. Add basil leaves and stir until wilted. Add tomatoes into the pot. If not crushed yet, use the back of a spatula to push and break the tomatoes until chunky. Season with sugar, salt, and pepper to taste. You want just enough sugar to bring out the natural sweetness of the tomatoes, but not verge into Pinoy spaghetti territory. Increase heat to medium-high to bring the mixture up to a soft boil.
Once boiling, reduce heat to low to maintain a very gentle simmer. Continue to cook, stirring occasionally, until tomato sauce has thickened, about 1 hour or more depending on your preference of flavor. Remove from heat and set aside.
Butterfly chicken: Pat chicken dry with paper towels. Working one piece at a time, place chicken breast on a clean cutting board; the short side of the breast must be facing you.
Using a sharp knife and moving from the side, insert the knife into the thickest part of the breast. Slice horizontally into the breast, taking care not to cut all the way through—you want to leave at least 2 inches from the end. Open chicken breast like a book and place between two sheets of plastic wrap. Using a rolling pin or a meat mallet, pound chicken until ⅓-inch thick. Season with salt and set aside. Repeat with remaining chicken.
Prepare for dredging: Set up a breading station by placing the flour, beaten eggs, and breadcrumbs into individual bowls. Arrange bowls next to each other in this order: flour, eggs, breadcrumbs.
Dredge and chill: Working with one cutlet at a time, dredge chicken in flour to coat all sides, gently patting off any excess. Dip chicken into the egg, letting any excess drip back into the bowl. Coat cutlet in panko, carefully pressing down to make sure the breadcrumbs stick. Flip chicken and continue pressing until chicken is fully coated all over. Transfer breaded cutlet to a rimmed baking sheet. Repeat with remaining chicken. Chill breaded cutlets in the fridge for at least 20 minutes and up to 8 hours.
Fry chicken: Pour clarified butter or neutral oil into a large, high-sided heavy skillet until butter or oil is 1 inch deep. Place over medium heat until hot enough for frying. To test, toss a bit of panko into the butter or oil. If it bubbles and browns nicely, you’re ready to fry. If the panko sinks, the butter is not hot enough; if the panko burns, the butter is too hot.
Working in batches to avoid crowding the pan, carefully lower chicken cutlets into the skillet. Cook, turning once, until deep golden brown on both sides, about 2 minutes per side. Set fried chicken cutlets to a metal rack or plate lined with paper towels. Season with salt immediately.
Assemble: Set oven to broil.
Arrange cutlets side by side in a baking tray. Generously spoon some tomato sauce over the center of each cutlet. Do not cover the entire cutlet in sauce; you want to leave the edges of the cutlet crispy. Divide grated mozzarella cheese between the three cutlets, sprinkling evenly on top of the tomato sauce. Repeat with grated Parmigiano Reggiano.
Place chicken in the oven and broil until cheese is melted, bubbling, and has some brown spotting, about 3–4 minutes. Let cool slightly, then garnish with parsley. Serve immediately, with any extra tomato sauce.